
I miss the good ol’ days. The days when I’d be sitting on the couch while Mom or Maw-Maw would cook. The dishes they were cooking always smelled so heavenly. The ingredients list always seemed short and preparation always seemed swift. I, if anything, am not swift in the kitchen. It doesn’t help when I choose a complicated recipe either. But sometimes they just look too good not to try!
 A lot of it probably stems on whether they were baking something or cooking something. I feel like they were magicians in the kitchen and would just whip up something in about twenty minutes that seemed to have come out of a Michelin Star restaurant. I guess it also boils down to what kind of eating habits we’re doing. If we’re eating fresh and local goods, the ingredients and prep are always super simple. Fresh veggies don’t need much to really make them amazing. Additionally, baking a fresh peach cobbler (mouth watering honestly) is one of the simplest baking recipes I can think of. So much so that I can recite a lazy man cobbler off the top of my head.
Today though, we have Keto baked goods. All recipes I’ve tried, I can honestly say I would not go to the trouble of making again, and will just settle with some delicious store bought Keto ice cream. Well, I mean, there was that one 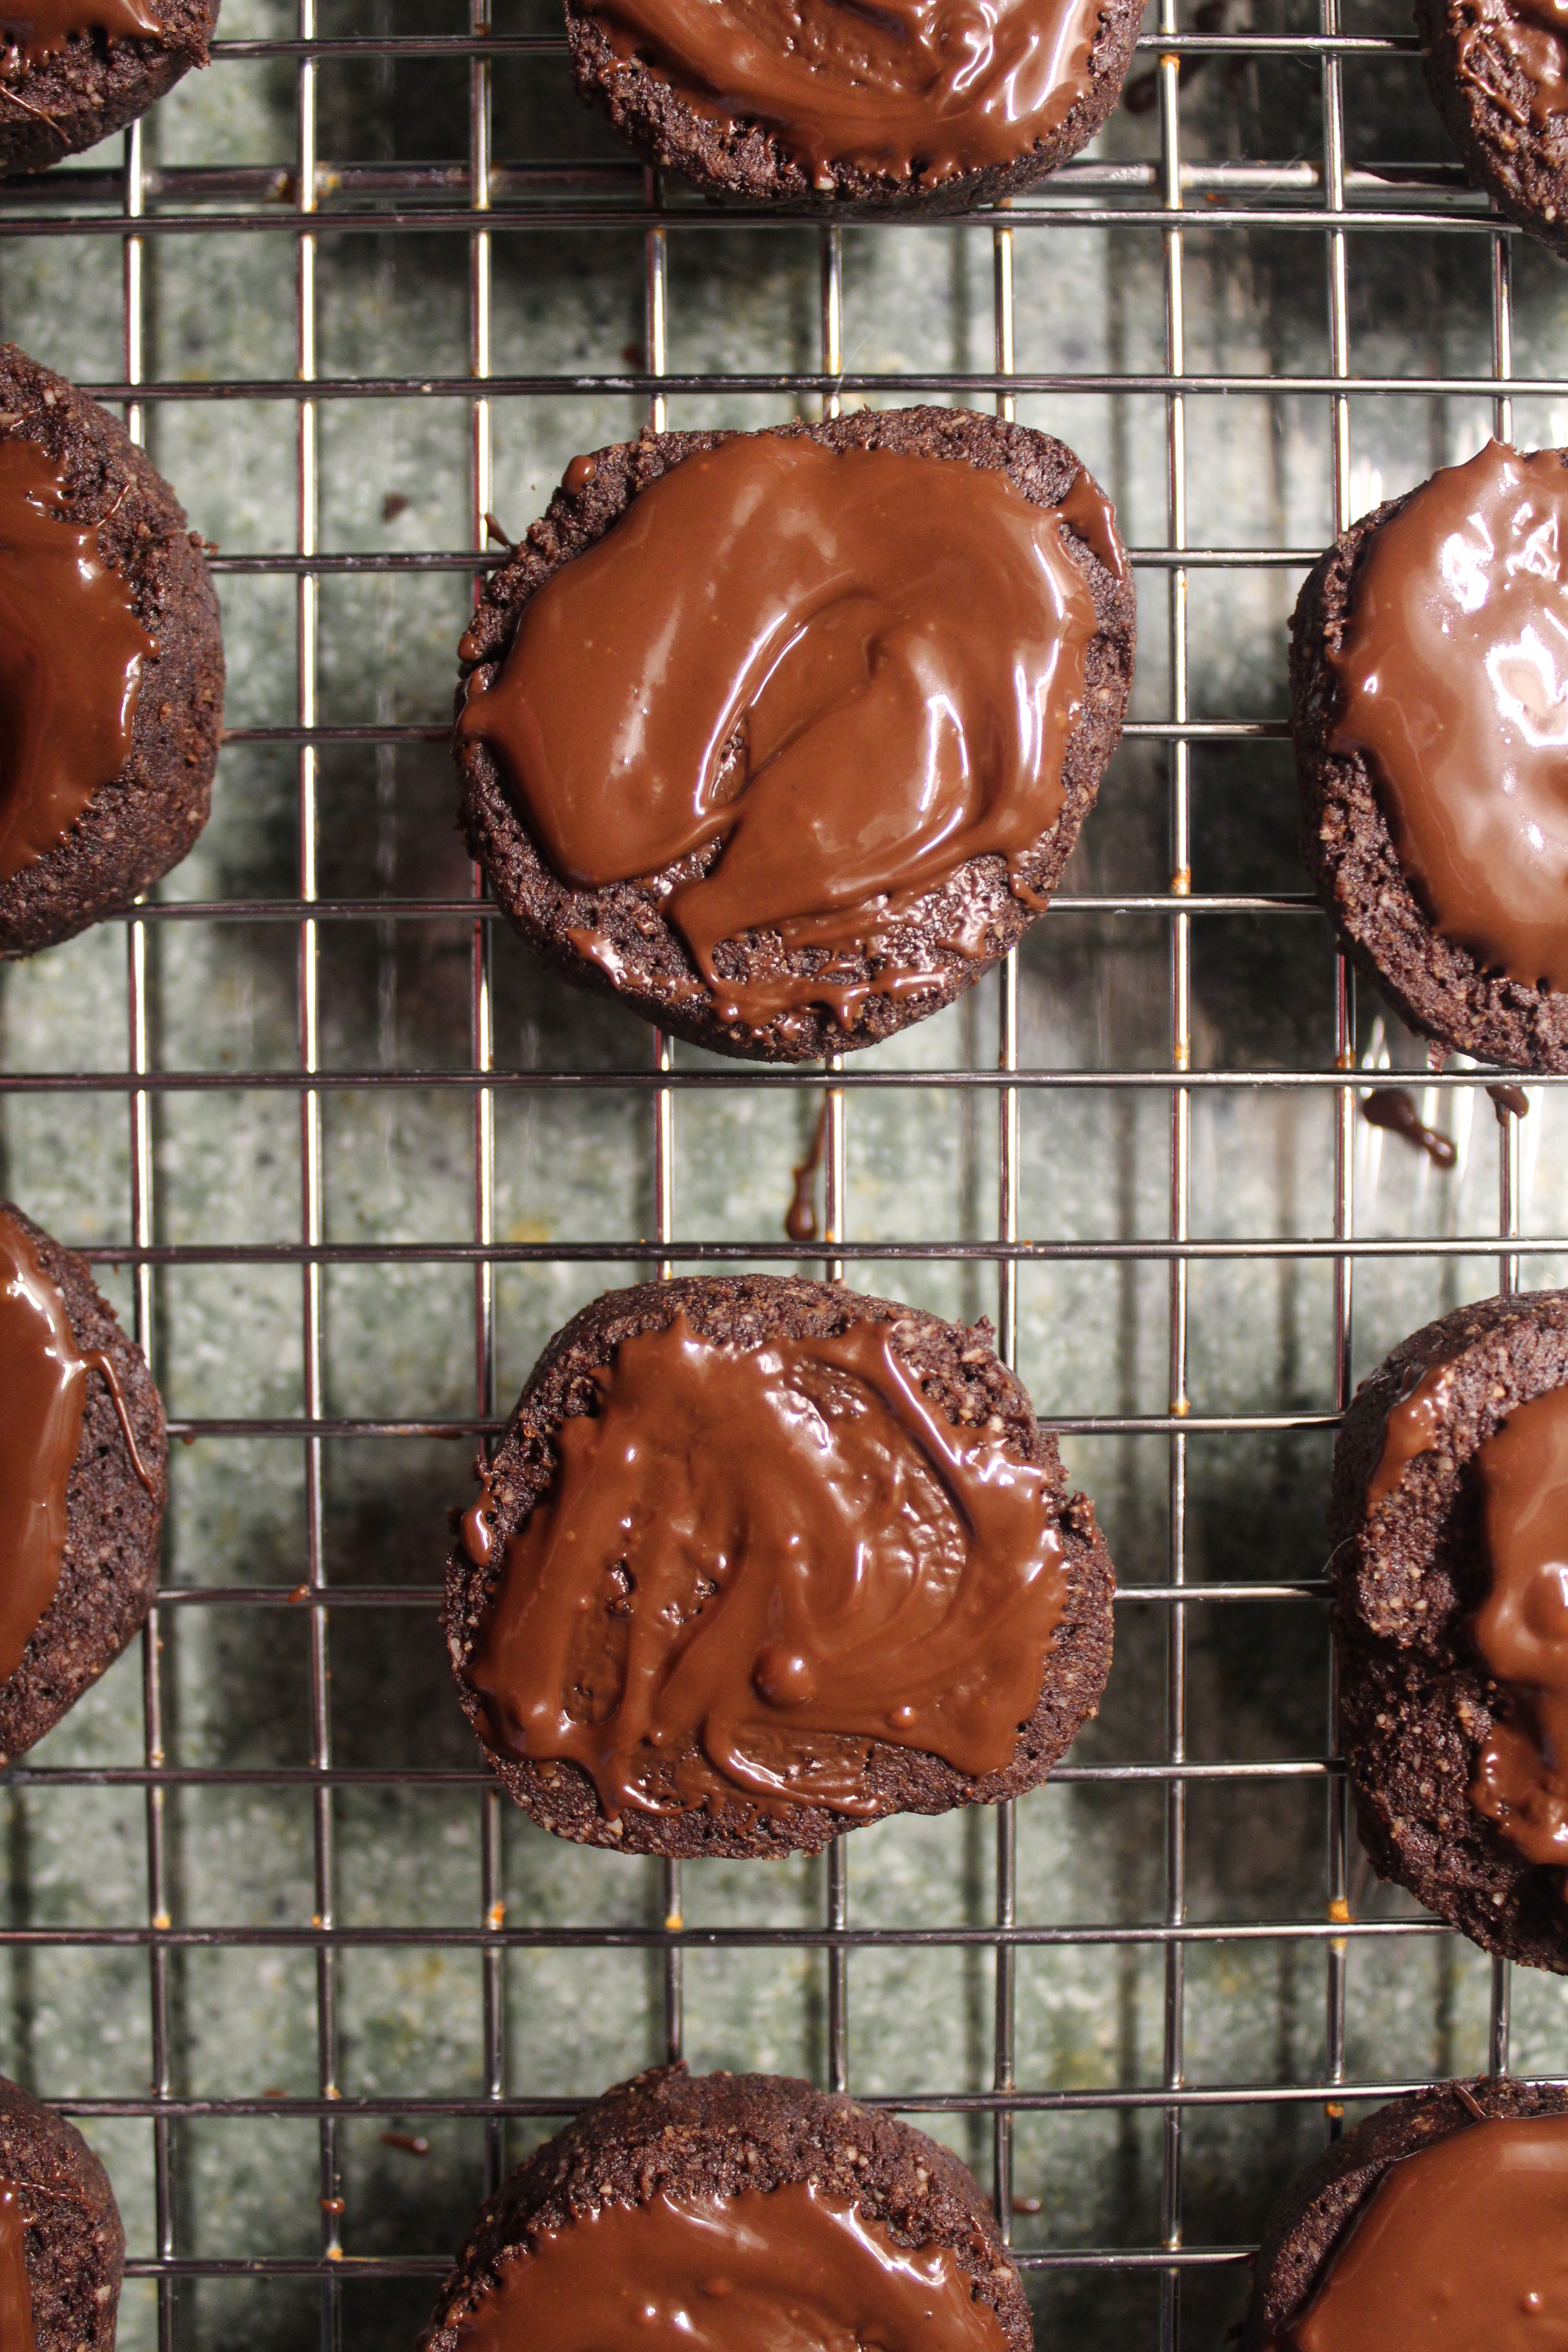 chocolate pie I made with a meringue crust…that baked for TWO hours BEFORE putting the filling in the crust. It was good, but maybe not worth all of the work or time unless we were hosting a dinner party.
These cookies were just another addition to the list of Keto baked goods that were complicated and took time. However, they were not an addition to the list of never making again. The way I made them, the recipe yielded 40 of them at .6 net carbs per cookie. I found less Lily’s in the cabinet than I needed, so they each received a dollop of mint chocolate on top. With the low carb count and the chocolate craving satisfaction one cookie can provide, I think they’re probably worth making in the future.
In the end, I still miss the simplicity of how the good ol’ days seemed in the kitchens I grew up inside. But maybe, just maybe, they were also looking at recipes sometimes, and they were good at hiding it. In truth, every kid thinks their parents and grandparents are full of magic. I know I sure do.
You can find the original recipe by clicking here. See my notes below, with the recipe. Make sure to visit their page to see their notes and post as well. Enjoy!
Thin Mint Cookies – Keto Style
Ingredients
For the cookies…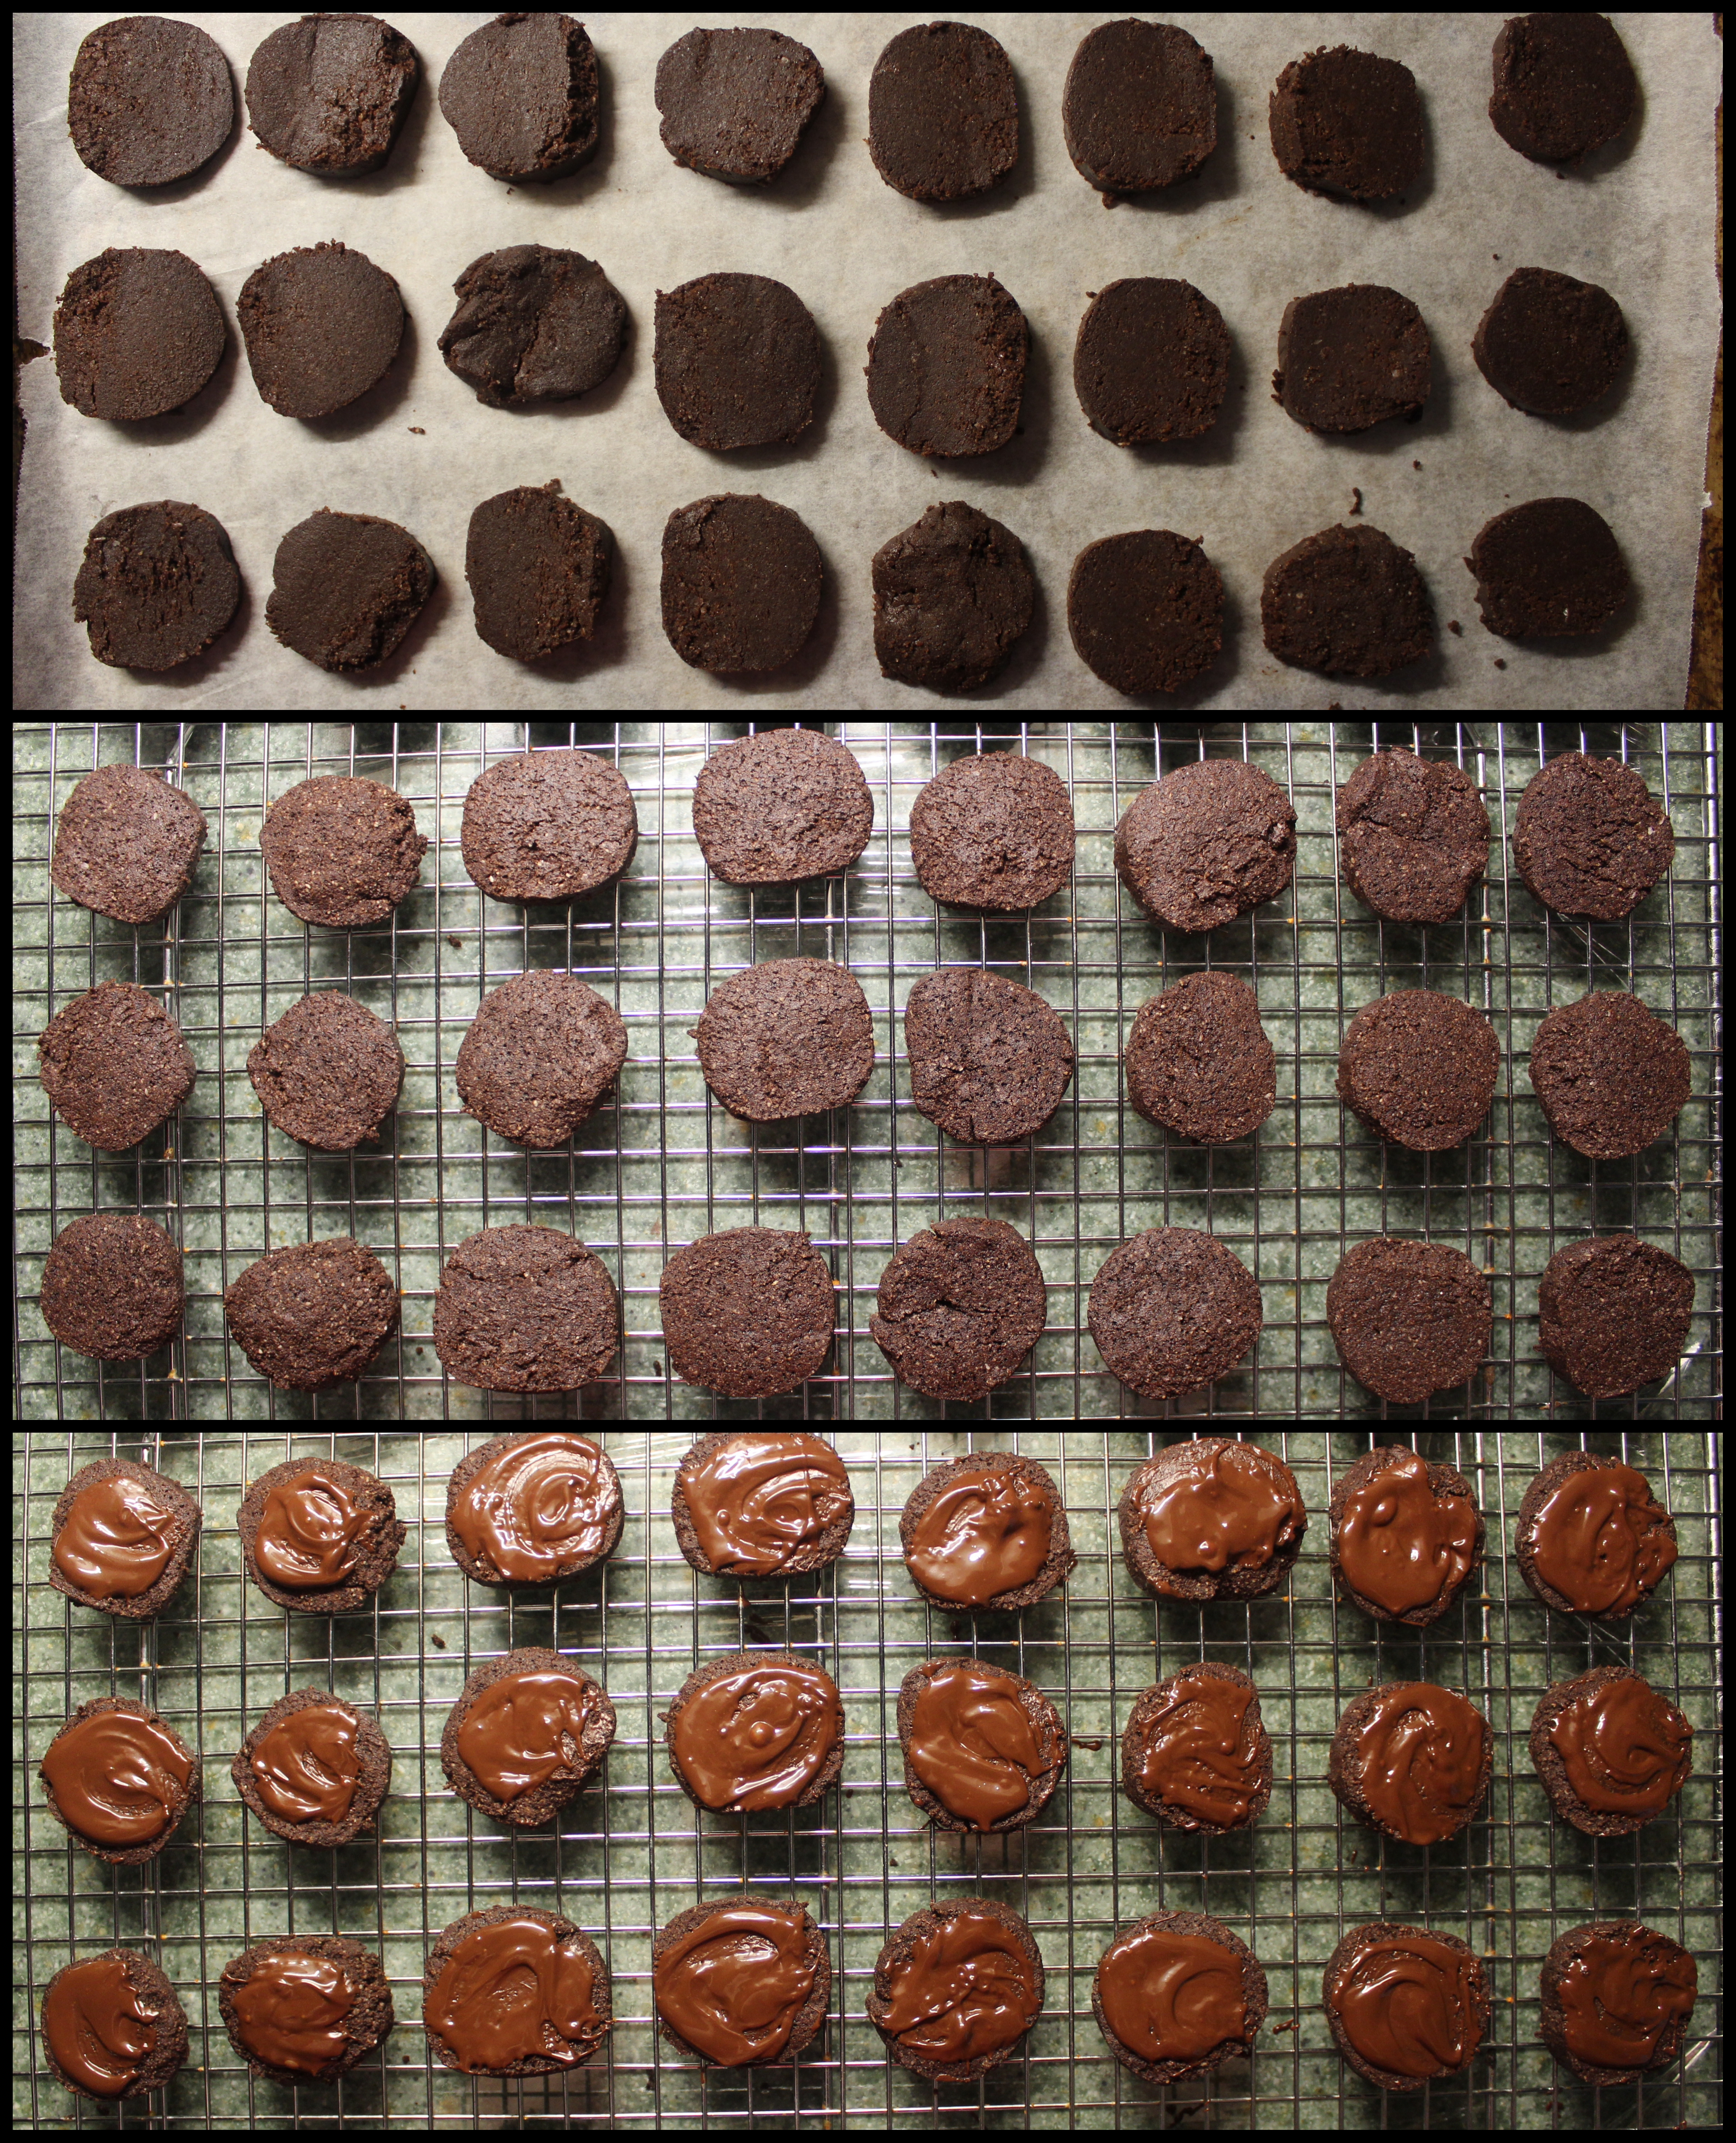
- 1 1/3 cup almond flour
- 2/3 cup cocoa powder
- 1/2 teaspoon kosher salt
- 1/2 teaspoon xanthan gum
- 1/2 teaspoon baking soda
- 5 1/2 tablespoons unsalted butter at room temperature
- 8 tablespoons erythritol
- 1 egg
For dipping…
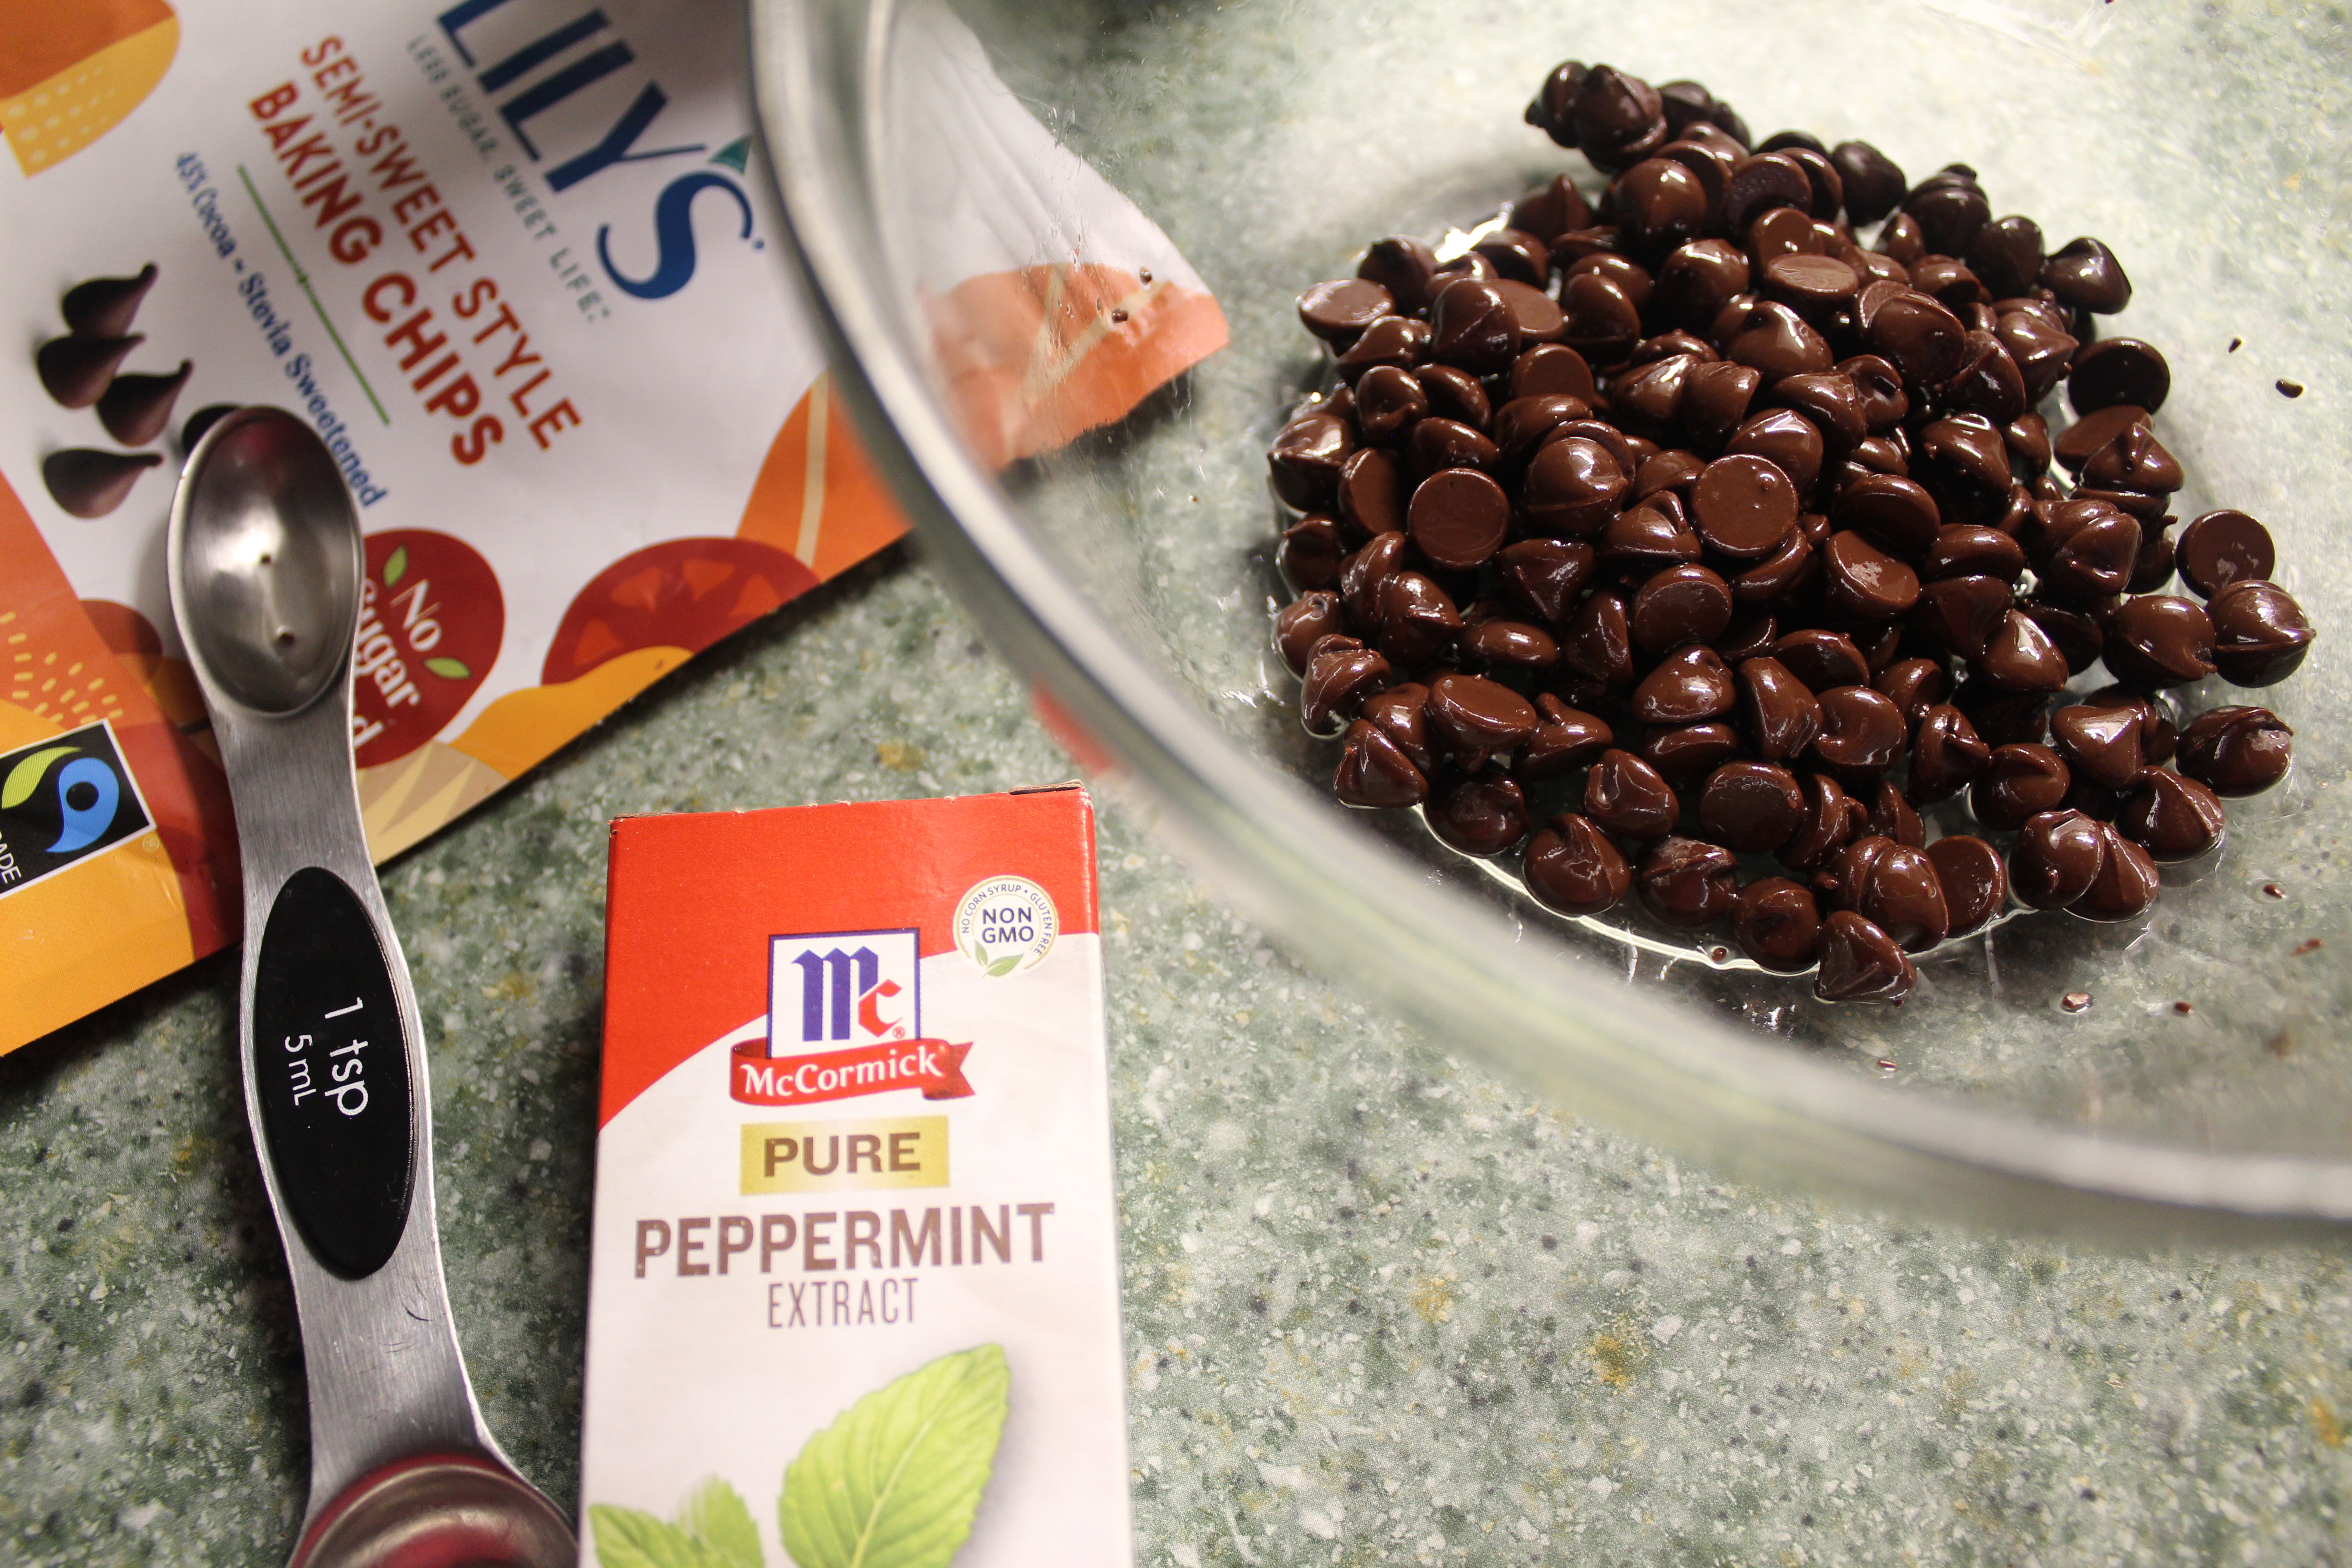
- 12 ounces dark chocolate such as Lily’s, melted (I used the semi-sweet, and I would even venture to recommend the mint chocolate Lily’s morsels if you can find them.)
- 1-3 teaspoons coconut oil as needed (to adjust thickness) (I only used 1 teaspoon, myself, and it ended up being a thicker coating than what you could probably get on them.)
- 1/4-1 teaspoon peppermint extract to taste (I only used about a 1/2 teaspoon, but it definitely could have used more.)
Instructions
- Add almond flour, cocoa powder, xanthan gum, salt and baking soda to a medium bowl. Whisk until
 thoroughly combined and set aside. (I had to break apart some clumps with my hands to make sure everything combined well.)
 - Cream butter in a large bowl with an electric mixer, 1 minute. Add in sweetener and continue to beat until light and fluffy, about 8 minutes. (I had to constantly scrape the sides of my mixing bowl, or else the paddle wasn’t really doing anything. Just keep an eye on it.)
- Add in the egg, mixing until just incorporated. The mixture will appear slightly ‘broken’ (i.e. not thoroughly smooth).
- With your mixer on low, add in half of your flour mixture- mixing until just incorporated. Mix in the rest.
- Wrap cookie dough with plastic wrap and refrigerate for 1 hour (or overnight). (I went ahead and put mine in a
 log shape, and wrapped it in plastic wrap. I put mine in the freezer, and forgot it in there for a couple hours. It was difficult to keep together when slicing, so I recommend sticking with the refrigerator and only for an hour or two. Otherwise, the dough is really crumbly and broke apart.)
 - Preheat oven to 350°F, and line a baking tray with parchment paper.
- Roll out the dough between two pieces of parchment paper and cutout the rounds (thin mints are roughly 2 inches). (If you did the log method like I did, then you would just need to unwrap and slice thin slices. I had to hold mine oddly to slice, as it was too cold to stay in one piece.)

- Transfer cutout cookies onto prepared baking tray and place in the freezer for 15 minutes prior to baking.
- Bake for 8-12 minutes. Since the cookies are dark already and you can’t guide yourself by color, I suggest doing a trial with one cookie if possible. When ready, the cookies will have puffed somewhat and smell amazing (this is our best cue here), but you’ll want to push the baking time to get them nice and crisp. So just keep an eye out for them. (My oven was good at 12 minutes.)
- Allow to cool for ten minutes before transferring to a cooling rack. Allow to cool completely, as they’ll continue to crunch up (because of the sugar alcohol, this may take a few hours!).
- Once cookies are cool and crunchy, melt chocolate and coconut oil in a water
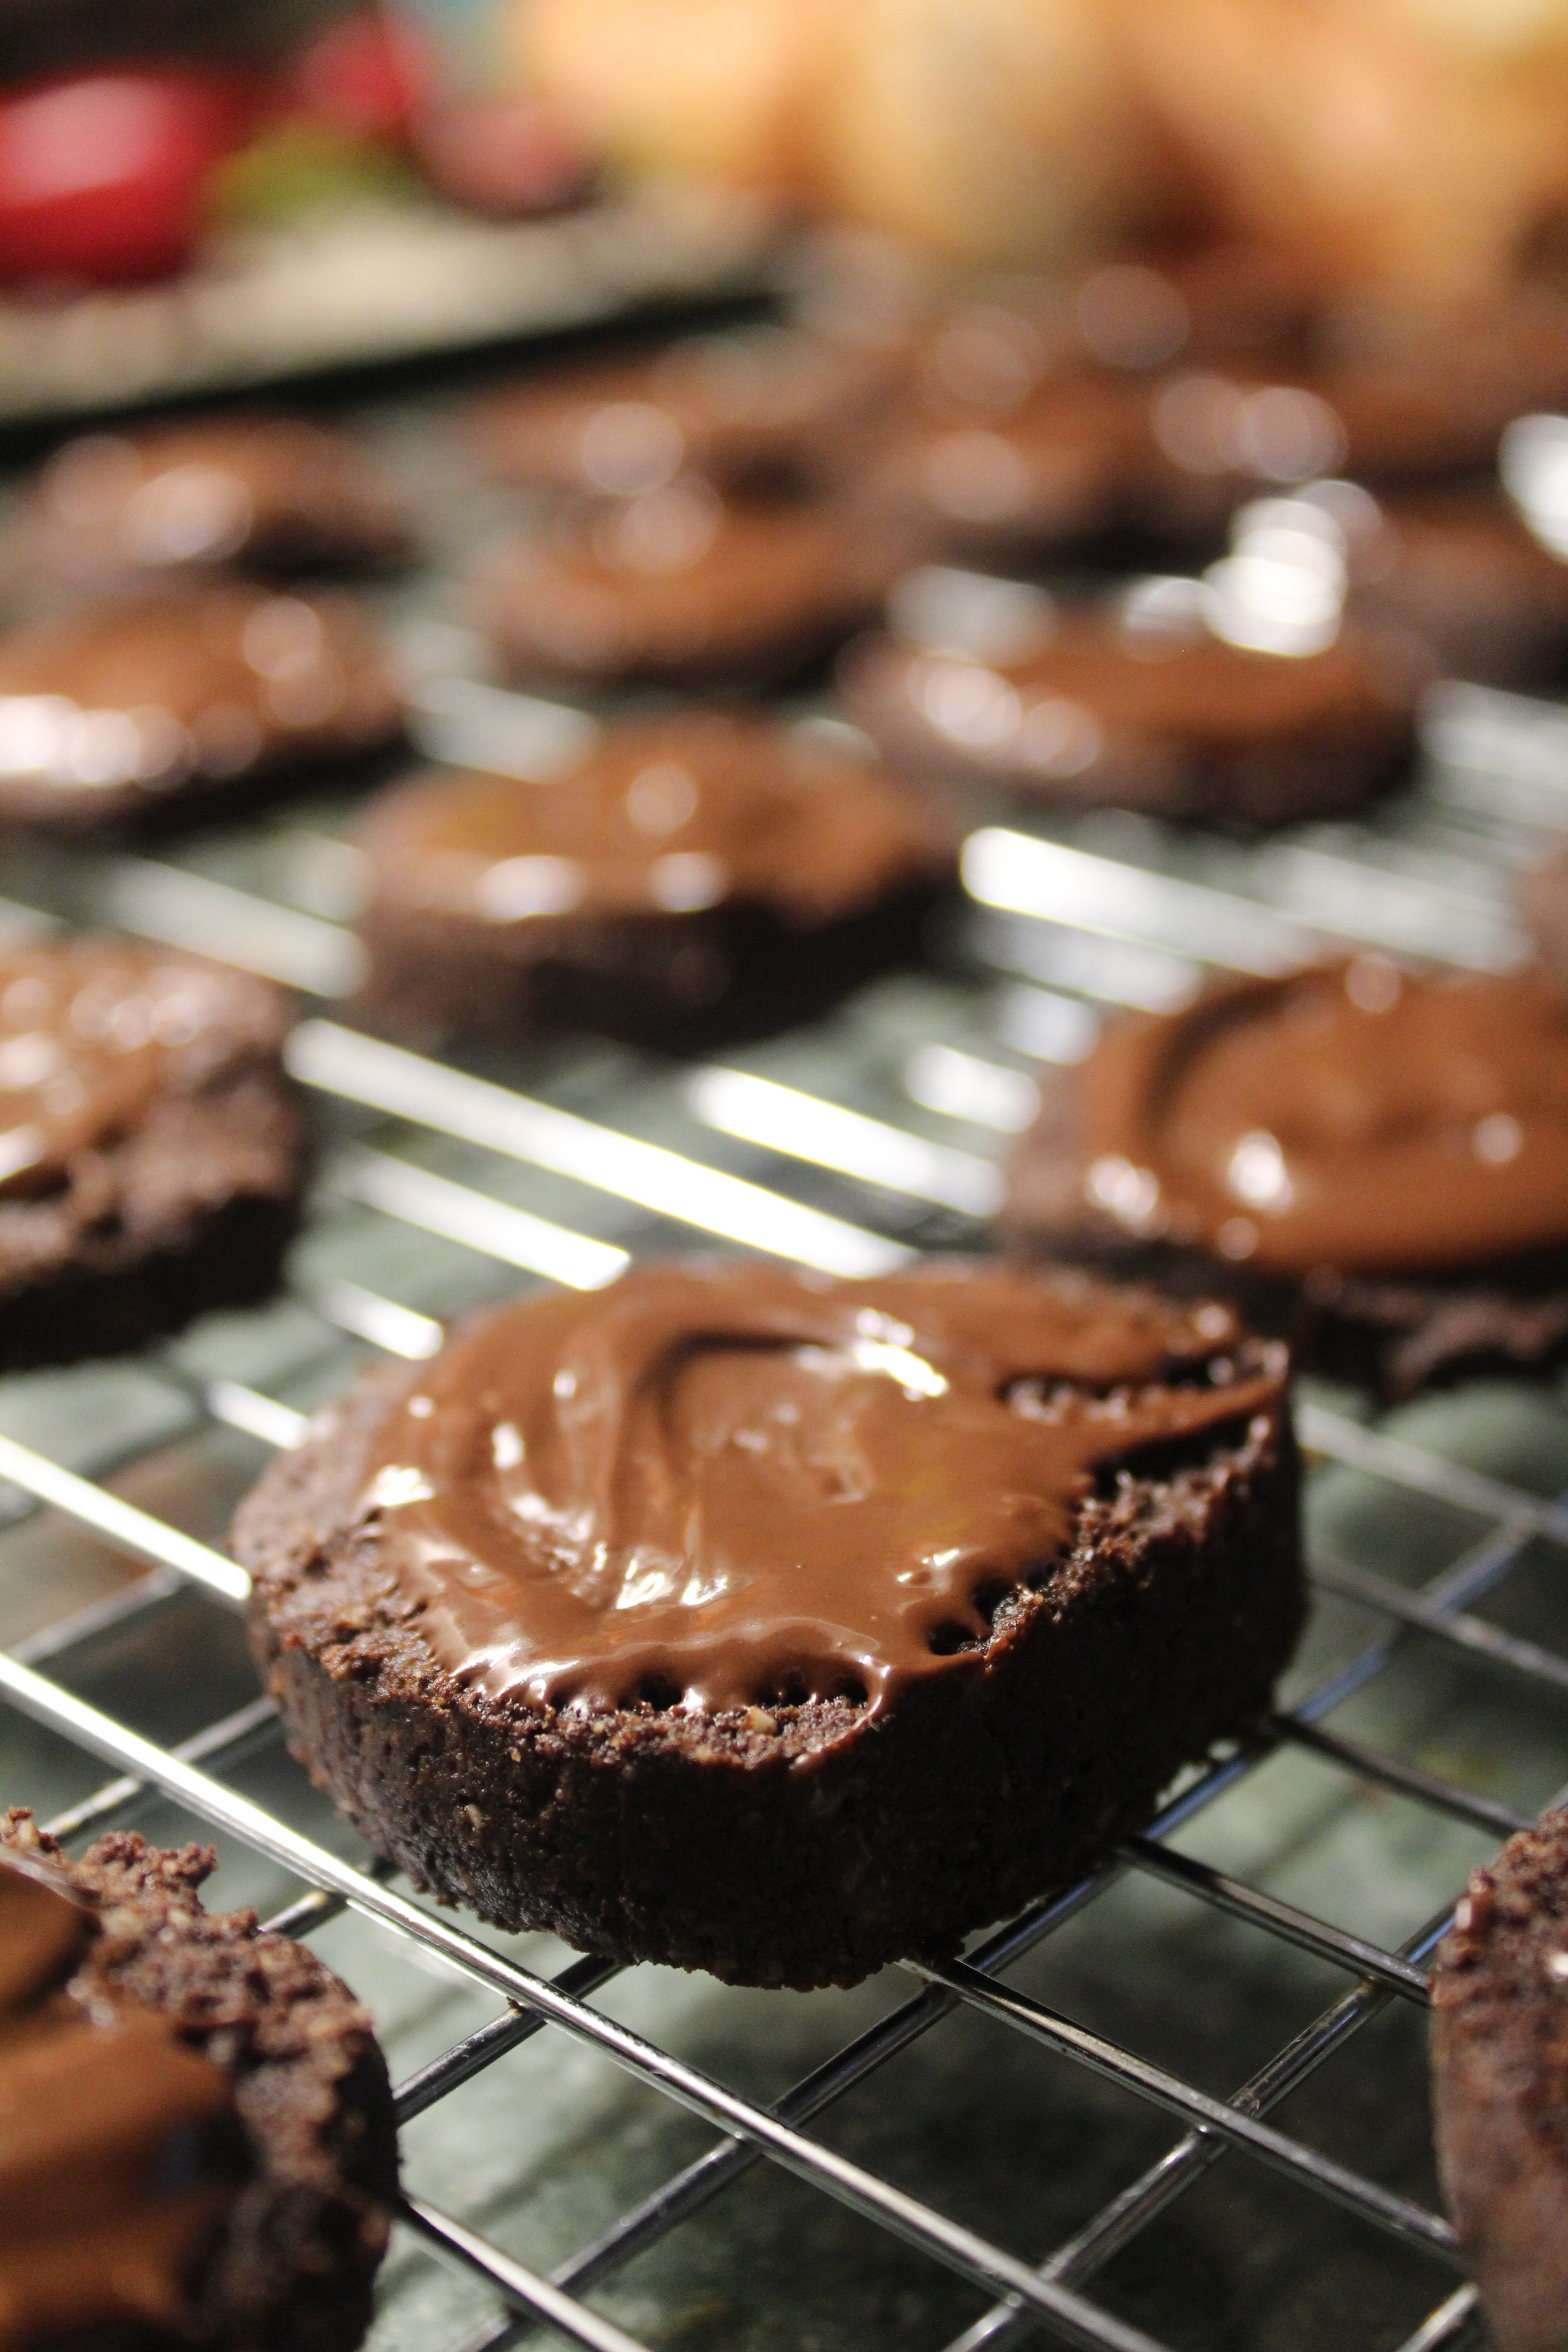 bath or microwave and incorporate peppermint extract little by little to taste. Dip the cookies into the chocolate using a fork and transfer to a parchment paper until set. You can always pop them in the freezer for a few minutes to instantly set them. (If anyone truly knows me, they know I am NOT the one to come to for chocolate dipped goodies. I have a friend that does that, and that is not me. I’m too much of a perfectionist and don’t like getting my hands that dirty in the kitchen. That may be another reason mine ended up with dollops on the tops and not submerged.)
 - Store in an airtight container for up to a week or in the freezer for a couple months. And keep in mind that these cookies can be baked, once shaped, straight from the freezer (the batter keeps well frozen for up to 3 months).

